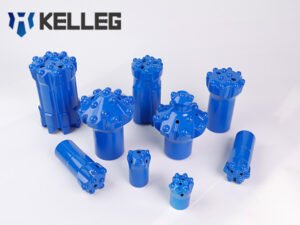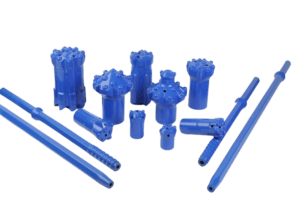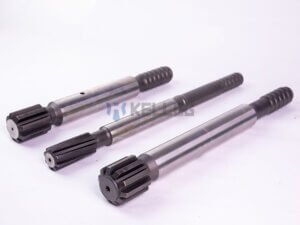

The correct combination of a rock drill bit, drill rod, and shank adapter depends on thread compatibility, drilling diameter, rock conditions, and the drill rig’s impact energy and operating parameters. The shank adapter must match both the rock drill and drill rod, while the rod and bit threads must be compatible. The rock drilling tools must also be balanced for impact energy, torque, rotation speed, feed force, and flushing capacity. A poorly matched system can waste impact energy, overheat or damage threads, accelerate bit and rod wear, cause premature component failure, and reduce the penetration rate.
Quick Check: Before ordering, verify the rock drill model, shank thread, rod thread, bit thread, hole diameter, hole depth, rock condition, and operating pressure.
What Determines the Compatibility of Rock Drilling Tools?
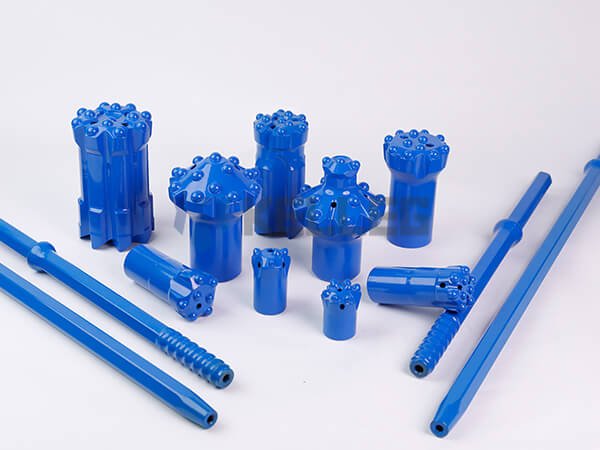
The compatibility of rock drilling tools is determined by four factors: thread or taper connection, drilling diameter, rock hardness and abrasiveness, and drill rig parameters. A bit, drill rod, and shank adapter may appear to fit dimensionally, but still perform poorly if the connection, impact energy, rotation, or flushing capacity is not properly matched.
Thread Compatibility
Rock drill bits and drill rods are connected mainly by threaded or tapered connections. Tapered connections are commonly used with pneumatic rock drills, with taper angles such as 7°, 11°, and 12° depending on the drill and tool design. For modern top hammer drilling, however, threaded connections are widely used because they provide a secure connection and allow the rock drilling tools to transmit impact energy and rotation through multiple rod sections.
Common top hammer thread families include R thread, T thread, and ST thread. Depending on the application, specifications may include R25, R28, R32, R35, R38, T38, T45, T51, and ST58. The exact thread designation must be checked rather than selected by diameter alone.
Thread matching is required at both ends of the rock drilling tools. The rock drill bit must match the drill rod, while the drill rod must match the shank adapter arrangement used by the rock drill. An incorrect thread profile, pitch, or connection specification can make the components incompatible or prevent the joint from tightening and transferring drilling energy correctly.
Thread compatibility is necessary, but it is not the only matching criterion.
Engineering Tip: Always verify the complete thread designation before ordering. R32 and T51 identify thread specifications; they should not be treated as interchangeable simply because their nominal dimensions appear similar.
Drilling Diameter
The required hole diameter determines the starting point for selecting the bit, but the drill rod and flushing requirement must also be considered. The main parameters are:
- Hole diameter: the diameter required by the drilling application.
- Bit diameter: the actual cutting diameter of the rock drill bit.
- Rod diameter: the outside diameter and stiffness of the drill rod, which affect alignment, bending resistance, and energy transmission.
- Flushing requirement: the air or water flow needed to remove cuttings efficiently from the hole.
A larger bit creates a larger annular area that must be cleaned of cuttings. Larger hole diameters generally require greater air/water flushing capacity and sufficient impact energy to maintain penetration.
There is no universal rule that assigns one drill rod size to every hole diameter. Hole depth, rock conditions, drill rig capacity, impact energy, and the required drilling method all affect the final selection.
Rock Hardness and Abrasiveness
Rock conditions determine how the drilling system should be balanced from the rock → impact → bit → rod → shank. Hard rock requires sufficient impact energy and an appropriate carbide configuration, while highly abrasive formations can accelerate gauge wear, button wear, and thread damage.
For example:
- Hard rock: requires a bit face and carbide button configuration capable of handling high impact loads.
- Abrasive rock: places greater emphasis on carbide wear resistance and appropriate drilling parameters.
- Fractured rock: may require a bit design that maintains stability and effective flushing as the hole conditions change.
- Mixed ground: usually requires a balanced bit and rod selection rather than optimizing one component for a single rock type.
Rock conditions therefore influence carbide button configuration, bit face design, drill rod grade, and thread selection. Changing only the bit may not solve a performance problem if the rod, shank, or drilling parameters are not suitable for the formation.
Drill Rig Parameters
The drill rig and rock drill determine how much mechanical energy the drilling system can actually use. Before selecting the tools, check the machine’s impact frequency, impact energy, rotation speed, torque, feed force, working pressure, and flushing capacity.
These parameters have to work together. Excessive rotation speed can accelerate bit and thread wear, while insufficient rotation may reduce drilling efficiency. Excessive feed force can overload the bit and rod, whereas insufficient feed may prevent the bit from maintaining effective contact with the rock. Working pressure and flushing capacity also directly affect rock drill performance and cuttings removal.
For this reason, rock drilling tools should be selected as a system, not as three independent components. The bit, drill rod, and shank adapter must be matched to each other and to the rock drill’s actual operating conditions.
| Matching Factor | What to Check | Why It Matters |
|---|---|---|
| Thread / Taper | Connection type and thread specification | Ensures component compatibility and energy transfer |
| Drilling Diameter | Hole, bit, and rod diameter | Affects penetration and flushing |
| Rock Conditions | Hardness, abrasiveness, fractures | Determines bit and rod configuration |
| Drill Rig Parameters | Impact, rotation, torque, feed, pressure, flushing | Determines whether the tool can perform properly |
How the Shank Adapter, Drill Rod, and Drill Bit Work as a System
A top hammer drilling transfers impact energy and rotational torque through a continuous rock drilling tool. The basic energy path is:
Rock Drill → Shank Adapter → Drill Rod → Rock Drill Bit → Rock
The shank adapter receives the impact from the rock drill and transfers it into the drill rod. The rod carries that impact energy and rotational torque down the hole to the bit, where the bit converts the mechanical energy into rock breaking. Every connection in this chain affects how efficiently the energy reaches the rock. A mismatch at one interface can increase vibration, heat, and wear while reducing penetration rate.
Shank Adapter-to-Drill Rod Matching
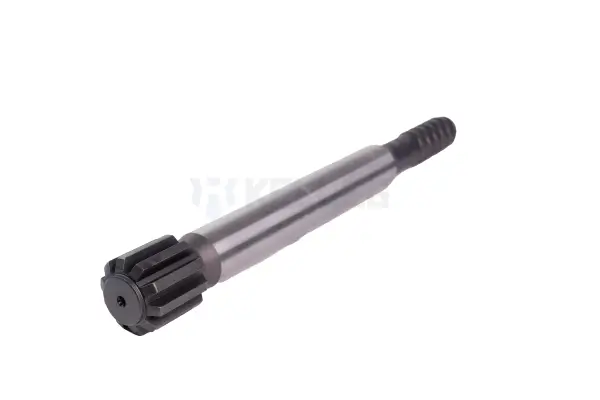
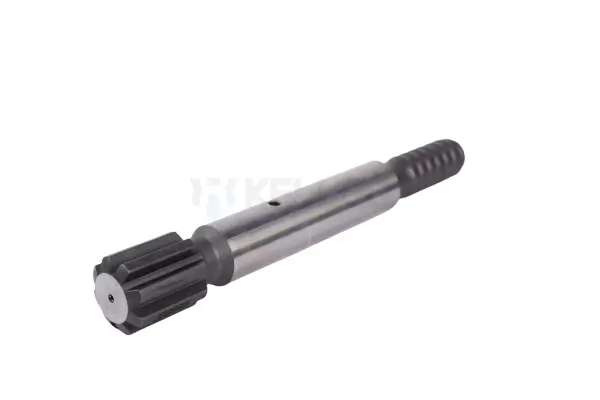
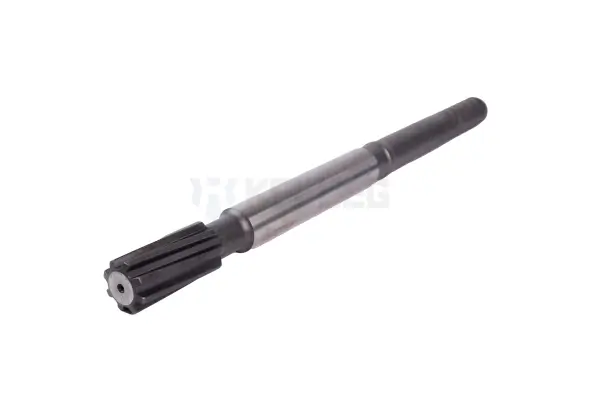
The shank adapter is the interface between the rock drill and the drill rod, so its connection must match both the machine and the rod. Before ordering, check the rock drill model, shank adapter thread, drill rod thread, shank dimensions, and the impact energy of the rock drill.
The shank adapter thread must be compatible with the corresponding drill rod thread. For example, if the rod uses a specific R or T thread, the shank adapter and connection arrangement must be designed for that system. Thread designation alone is not enough; the thread profile, pitch, connection dimensions, and manufacturer-specific specifications must also be verified.
Machine compatibility is equally important. A shank adapter may have the correct rod thread but still be unsuitable for the rock drill because its shank dimensions or drive configuration do not match the machine. The adapter must correctly fit the drill’s front head and transmit the available impact energy without excessive deformation or stress concentration.
Impact energy also needs to be considered. A shank adapter used with a high-impact-energy rock drill must have sufficient strength and fatigue resistance for the operating load. If the adapter is undersized or poorly matched, repeated impact loading can lead to thread damage, abnormal wear, cracking, or premature shank failure.
A properly matched shank adapter should therefore meet three conditions: it fits the rock drill, connects correctly to the drill rod, and can withstand the machine’s impact and rotational loads.
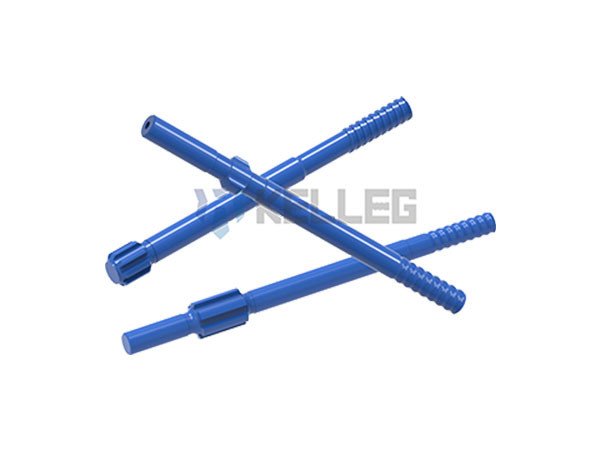
Send us your rock drill model and drill rod thread. We can help verify the correct shank adapter.
How to Match Drill Rods with Rock Drill Bits
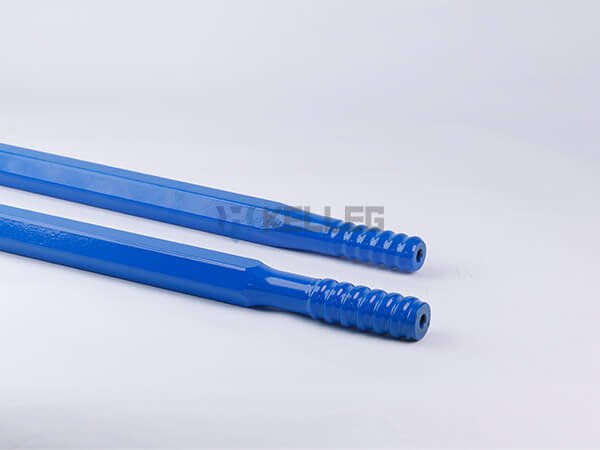

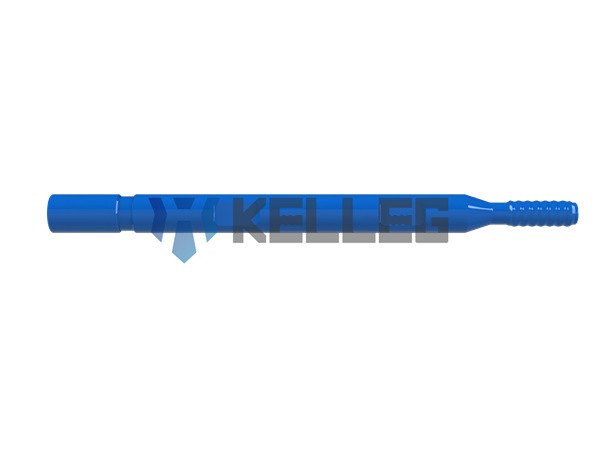
A drill rod and rock drill bit must match in thread specification, diameter, strength, and drilling application. Thread compatibility is the first requirement, but the correct combination also depends on hole diameter, hole depth, rock conditions, impact load, torque, and the expected fatigue life of the rock drilling tools.
Rod Thread Must Match the Bit Thread
The drill rod and rock drill bit must use compatible thread specifications and connection dimensions. Common top hammer thread types include R25, R28, R32, R35, R38, T38, T45, and T51, with the appropriate selection depending on the drill rig, rock drill, hole diameter, and drilling application.
One common purchasing mistake is to treat the thread designation as the complete product name. R32, T38, and T45 are thread specifications, not complete drill bit models. A buyer should therefore confirm the complete bit and rod specification rather than ordering a bit simply because its thread designation appears to match the existing rod.
The connection must also provide proper thread engagement and contact. An incorrect thread profile, pitch, diameter, or connection length can prevent the bit from seating correctly, reduce impact transfer, or concentrate stress at the threaded joint. In severe cases, the connection may loosen during drilling or suffer premature thread failure.
Choose the Rod Diameter for the Hole Size
Rod diameter should be selected together with the drilling diameter, hole depth, and rod length, not from hole diameter alone. The rod needs enough stiffness to remain reasonably straight under feed force, impact loading, and rotation.
As hole depth increases, drill rod stiffness and straightness become increasingly important. A rod that works well for short holes may not be the best choice for deep drilling. A long, slender drill rod is more susceptible to bending and vibration, especially when drilling deviated holes or fractured formations.
The relationship between bit diameter and rod diameter also affects flushing. The clearance between the rod and borehole wall provides the passage for compressed air or water and drilled cuttings. If the overall tool configuration restricts flushing, cuttings can accumulate around the bit, increasing regrinding, heat, and wear.
There is no universal bit-diameter-to-rod-diameter rule that applies to every application. Hole depth, drilling method, rock formation, rig capacity, and flushing conditions must be evaluated together.
Match Rod Strength to Drilling Conditions
A drill rod is subjected to repeated impact load, rotational torque, bending, and fatigue. The required rod strength therefore depends on the rock formation, hole depth, drilling parameters, and the amount of mechanical energy delivered by the rock drill.
Hard and abrasive rock can increase impact loading and tool wear. Deep holes increase bending and fatigue risk. High torque or excessive feed force can place additional stress on the rod and threaded connections.
Higher hardness does not automatically mean better drill rod performance. The rod needs a balance of surface hardness, core toughness, thread strength, and fatigue resistance. A rod that is excessively hard but lacks sufficient toughness can be less tolerant of impact and bending loads, while insufficient surface hardness can accelerate wear at the threads and connection areas.
For demanding drilling conditions, the rod should therefore be selected according to the complete load profile rather than a single hardness value. The objective is not simply to find the hardest rod, but to achieve reliable energy transmission and fatigue resistance throughout the expected drilling cycle.
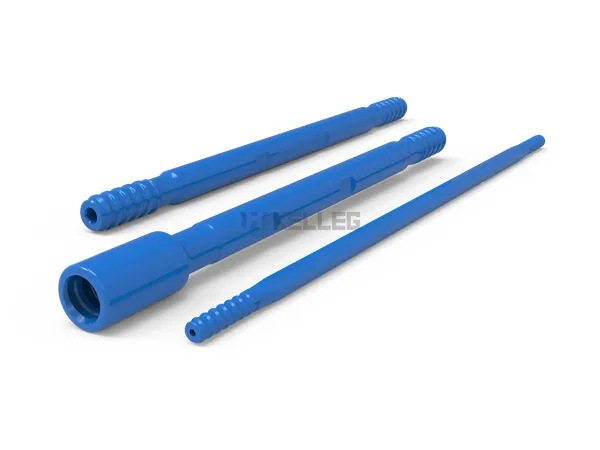
Rock Drill Bit Selection: More Than Just Thread Size
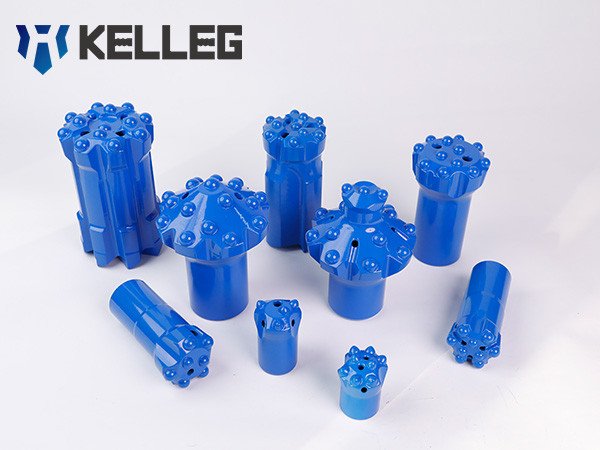

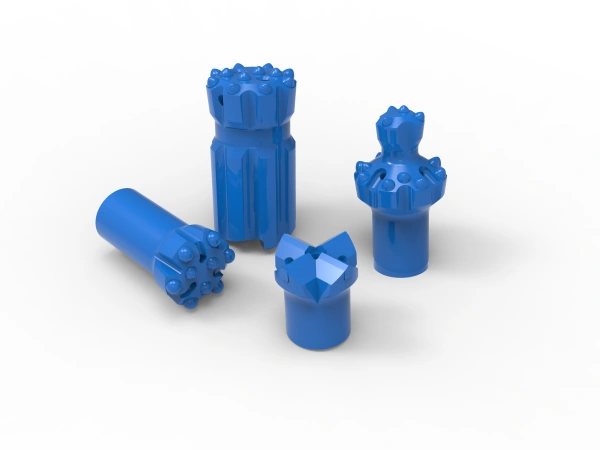
A matching thread does not automatically make a rock drill bit suitable for the application. Bit selection must also consider the required hole diameter, rock hardness and abrasiveness, bit face design, carbide button configuration, and the drilling rig’s operating parameters. A bit can connect correctly to the rod and still deliver poor penetration or wear prematurely if its diameter or cutting structure is wrong for the formation.
Match Bit Diameter to the Required Hole Diameter
The bit diameter should be selected according to the required hole diameter, while also allowing for normal gauge button wear during drilling. A new bit may initially drill close to its nominal diameter, but abrasive rock, repeated impact, and gauge button wear can gradually reduce the effective hole size.
The required hole diameter therefore needs to be considered together with bit diameter, wear allowance, hole depth, and ground conditions. In overburden or highly fractured formations, the hole can also become unstable or enlarge irregularly. Simply selecting a larger bit does not necessarily solve the problem and may increase the required impact energy and flushing capacity.
For deeper holes, maintaining hole straightness and adequate cuttings removal becomes increasingly important. The bit must generate sufficient rock-breaking energy while leaving enough clearance for efficient flushing around the rock drilling tools.
Choose the Bit Face Design for the Rock
The bit face should match the way the rock breaks under impact. Hard, competent rock, highly abrasive rock, fractured rock, and mixed ground place different demands on the carbide layout and bit face.
| Rock Condition | Typical Bit Consideration |
|---|---|
| Hard, competent rock | Button bit with suitable carbide buttons for high impact loading |
| Highly abrasive rock | Wear-resistant carbide buttons and adequate gauge buttons |
| Fractured rock | Bit design that provides stability and effective flushing |
| Mixed rock | Balanced carbide layout, durability, and adaptability to changing ground |
These are selection guidelines rather than fixed rules. Actual bit selection should be verified against the drill rig, rock properties, hole diameter, and drilling method. The same bit design may perform differently when impact energy, rotation speed, feed force, or flushing conditions change.
Button Configuration and Carbide Grade
Carbide buttons are the primary cutting elements of a button bit, and their shape, diameter, layout, and grade affect how impact energy is transferred into the rock.
The button layout needs to provide a balance between rock penetration and bit durability. Center buttons handle a large portion of the central impact area, while gauge buttons maintain the outer diameter of the hole and are exposed to significant abrasive wear. The number and arrangement of buttons also influence how effectively the bit breaks and clears the rock.
Button shape matters as well. Different profiles can be selected to balance penetration, impact resistance, and wear performance. Larger buttons can provide greater impact resistance in demanding formations, while smaller or differently shaped buttons may be appropriate where penetration and cutting action are prioritized.
Carbide grade should be selected according to the expected combination of impact loading and abrasion. A harder carbide grade is not automatically the best choice; excessive hardness can come at the expense of toughness under severe impact conditions. The practical objective is to select a carbide grade and button configuration that provide a suitable balance of penetration, wear resistance, impact toughness, and service life for the actual rock formation.
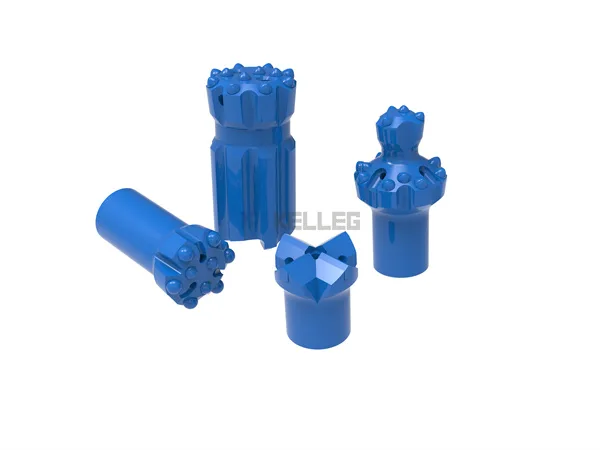
Rock Drill Bit, Drill Rod, and Shank Adapter Matching Table
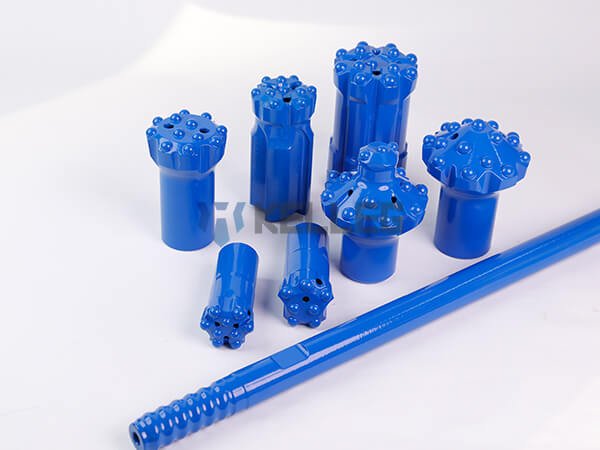
Before ordering rock drilling tools, check the complete drill system rather than confirming each component separately. The following table summarizes the main compatibility points and the typical problems caused by a mismatch.
| Component | Must Match With | Key Parameters to Check | Common Problems When Mismatched |
|---|---|---|---|
| Shank Adapter | Rock Drill + Drill Rod | Drill model, thread, shank dimensions, impact energy, flushing | Poor impact transfer, shank wear, thread damage, premature shank failure |
| Drill Rod | Shank Adapter + Drill Bit | Thread, diameter, length, strength, hole depth | Rod bending, fatigue failure, excessive wear, vibration |
| Rock Drill Bit | Drill Rod + Rock | Thread, diameter, carbide layout, bit face design, rock condition | Low penetration rate, gauge wear, poor flushing, premature bit failure |
| Rock Drill | All components | Impact energy, torque, rotation speed, feed force, working pressure, flushing capacity | Low ROP, overheating, excessive vibration, premature component failure |
The key point is simple: a compatible thread does not guarantee a compatible drilling system. The bit, rod, and shank adapter must be selected according to the drill rig, hole diameter, drilling depth, rock conditions, and operating parameters.
What Happens When Rock Drilling Tools Are Poorly Matched?
Poorly matched rock drilling tools can cause more than simple thread incompatibility. When the shank adapter, drill rod, rock drill bit, and drilling parameters are not properly matched, the result can be impact energy loss, excessive vibration, thread overheating, premature component failure, and a low penetration rate. If drilling suddenly becomes slow, checking the complete drilling tool is often more useful than replacing the bit alone.
Thread Overheating and Abnormal Wear
Thread overheating is commonly caused by incorrect thread matching, excessive torque, insufficient lubrication, loose connections, poor thread contact, or improper rotation parameters. When mating threads do not seat correctly, the contact area between components is reduced, increasing friction and localized stress during drilling.
Check the following when threads become hot or show abnormal wear:
- Incorrect thread: The bit, drill rod, or shank adapter may have the wrong thread specification, profile, pitch, or connection dimensions.
- Excessive torque: High rotational torque increases friction and stress at the threaded connection.
- Insufficient lubrication: Poor lubrication increases friction and heat generation.
- Loose connection: A connection that is not properly tightened can produce impact movement between mating surfaces.
- Poor thread contact: Damaged, worn, or incorrectly manufactured threads may not distribute the drilling load evenly.
- Improper rotation parameters: Excessive rotation speed or an unsuitable combination of rotation speed and feed force can increase thread loading and heat.
Thread temperature should therefore be treated as a drilling-system warning sign, not simply a rod or bit problem. Inspect the thread condition, connection tightness, lubrication, torque, and rotation parameters before continuing to drill.
Impact Energy Loss
Impact energy is not transferred from the rock drill to the bit with 100% efficiency. The practical energy path is Rock Drill → Shank Adapter → Drill Rod → Rock Drill Bit, and every connection and component in this path affects how efficiently the impact reaches the rock.
A worn thread, loose connection, damaged shank, bent rod, poor contact surface, or unsuitable component combination can interrupt this energy transfer. Some of the impact energy is then consumed by vibration, deformation, friction, or movement at the connections rather than being used to break rock.
Typical field symptoms include:
- Lower penetration rate
- More vibration
- Abnormal drilling noise
- Increased bit or rod wear
- Higher operating temperatures
- Unstable drilling performance
If the rock drill is operating normally but penetration has dropped, do not assume that the bit is automatically the cause. Check the shank adapter, rod connections, rod straightness, thread condition, and drilling parameters as part of the same system.
Premature Drill Rod Failure
Premature drill rod failure is usually associated with bending, excessive torque, cyclic fatigue, thread damage, poor alignment, or using a rod that is unsuitable for the hole depth and drilling conditions. Drill rods are subjected to repeated impact, rotation, axial feed force, and bending loads, so even a small alignment or connection problem can become a fatigue problem over time.
Common causes include:
- Bending: A bent rod can create additional bending stress and accelerate fatigue.
- Excessive torque: High torque increases torsional stress, particularly at the threaded connection.
- Fatigue: Repeated impact and cyclic loading can eventually initiate cracks, especially when stress concentrations are present.
- Thread damage: Damaged threads reduce the effective connection area and can concentrate stress.
- Poor alignment: Misalignment between the rock drill, shank adapter, rod, and hole can increase bending loads.
- Unsuitable rod for hole depth: Deeper holes generally require greater rod stiffness and straightness. A rod suitable for short-hole drilling may not provide adequate stability in a deeper hole.
A rod that repeatedly breaks at or near the thread should not simply be replaced with another identical rod. Check alignment, torque, hole depth, rod condition, thread engagement, and drilling parameters to identify the underlying cause.
Premature Bit Wear
Premature rock drill bit wear can result from the wrong carbide configuration, unsuitable drilling parameters, excessive rotation speed, insufficient flushing, or highly abrasive rock. A bit with the correct thread can still wear rapidly if its face design and carbide configuration do not suit the rock and drilling conditions.
Check the following:
- Wrong carbide configuration: Button shape, size, layout, and gauge button should be appropriate for the rock and drilling method.
- Incorrect drilling parameters: Excessive or insufficient impact, feed force, or rotation can affect bit wear and penetration.
- Excessive rotation speed: High rotation speed can increase carbide and gauge button wear, particularly in abrasive formations.
- Insufficient flushing: Poor air or water flushing allows cuttings to remain around the bit, increasing regrinding and abrasive wear.
- Abrasive rock: Highly abrasive formations can wear gauge buttons and skirt body much faster than competent, less abrasive rock.
When a new bit performs well initially but loses cutting performance quickly, inspect the bit design, rock abrasiveness, flushing, rotation speed, and impact/feed settings before changing to another bit specification.
Low Penetration Rate Despite a New Bit
A new rock drill bit does not guarantee a high penetration rate. If drilling is still slow after replacing the bit, troubleshoot the complete drilling system in this order: Bit → Rod → Shank Adapter → Rock Drill → Air/Water → Rock.
Rock Drill Bit
Check:
- Bit diameter and face design
- Thread compatibility
- Button configuration
- Gauge button condition
- Carbide damage
- Bit wear pattern
If the bit is new but the cutting structure is unsuitable for the rock, penetration can remain low from the beginning.
Drill Rod
Check:
- Rod straightness
- Thread condition
- Connection tightness
- Rod diameter and length
- Suitability for hole depth
- Signs of bending or fatigue
A damaged or poorly aligned rod can reduce impact transmission and increase vibration even when the bit is new.
Shank Adapter
Check:
- Correct shank adapter model
- Thread compatibility
- Connection condition
- Impact face condition
- Wear or damage
The shank adapter is the first major connection between the rock drill and drill rod. Problems here can affect the entire energy-transfer path.
Rock Drill
Check:
- Impact frequency
- Impact energy
- Rotation speed
- Feed force
- Operating pressure
- Drill mechanism condition
The rock drill must provide operating parameters appropriate for the selected drilling tools. A high-performance bit cannot compensate for insufficient or unstable impact energy.
Air or Water Flushing
Check:
- Air or water pressure
- Flow rate
- Flushing efficiency
- Blocked passages
- Cuttings removal
Poor flushing can slow drilling by allowing cuttings to accumulate around the bit and interfere with effective rock breaking.
Rock
Finally, check the actual formation:
- Rock hardness
- Abrasiveness
- Fracturing
- Bedding or jointing
- Changes in geological conditions
If the drilling conditions have changed, a bit and rod combination that worked well in one section may no longer provide the same penetration rate.
When drilling becomes slow, replacing the bit should be only one part of the diagnosis. A better approach is to trace the complete energy and load path from the rock drill to the rock and identify where performance is being lost.
Information to Provide Your Supplier
When ordering rock drilling tools, provide your supplier with the drill rig and rock drill model, drilling method, hole diameter and depth, rock conditions, thread specifications, working pressure, and current drilling problems. These details allow the supplier to evaluate the complete drilling system rather than selecting a bit, drill rod, or shank adapter from a single specification.
At minimum, provide the following information:
| Information | Why It Matters |
|---|---|
| Drill rig/rock drill model | Determines the compatible shank adapter, impact system, rotation capability, and suitable drilling tools. |
| Drilling method | Identifies whether the application uses top hammer drilling, DTH drilling, or another drilling method. |
| Hole diameter | Determines the required rock drill bit diameter and affects rod selection and flushing requirements. |
| Hole depth | Helps determine suitable drill rod length, stiffness, straightness, and connection requirements. |
| Rock type | Provides a starting point for selecting bit face design and carbide configuration. |
| Rock hardness/abrasiveness | Helps balance penetration, carbide wear resistance, and bit service life. |
| Drill rod thread | Must be compatible with the rock drill bit and the shank-side connection. Provide the complete thread specification rather than only the nominal diameter. |
| Shank adapter | Provide the current shank adapter model or specification so its compatibility with the rock drill and drill rod can be checked. |
| Working pressure | Helps determine whether the drilling tools and rock drill are operating within an appropriate pressure range. |
| Current drilling problems | Low penetration rate, excessive vibration, thread overheating, rapid bit wear, rod breakage, or other symptoms can help identify the actual cause instead of simply replacing a component. |
If available, also provide photos of the existing bit, drill rod threads, and shank adapter, together with the markings or model numbers on the components. This can help confirm specifications when the original tool documentation is unavailable.
Before You Order: The more complete the drilling information, the easier it is to recommend a compatible bit–rod–shank combination and avoid performance problems after installation.
When Should You Replace the Bit, Rod, or Shank Adapter?
Rock drilling components should be replaced when wear or damage begins to affect drilling performance, impact transmission, connection integrity, or operating safety. The correct replacement decision depends on the component’s condition and the drilling symptoms—not simply on how long it has been in service.
Before replacing a component, inspect the bit, drill rod, shank adapter, connections, and drilling parameters as a complete system. Replacing a worn bit will not solve a bent rod, damaged thread, or worn shank adapter.
Replace the Bit When…
Replace the rock drill bit when its cutting structure or gauge button has worn enough to reduce penetration, increase vibration, or affect hole diameter and drilling stability.
Typical replacement indicators include:
- Gauge buttons or carbide buttons are excessively worn or damaged.
- The bit can no longer maintain the required hole diameter.
- Penetration rate has dropped significantly despite appropriate drilling parameters.
- Carbide buttons are cracked, broken, excessively flattened, or missing.
- The bit face or body shows severe abnormal wear.
- Flushing performance around the bit has deteriorated because of excessive wear or blockage.
- The bit develops damage that could affect drilling stability.
Do not judge bit life by penetration rate alone. A bit may still drill, but if gauge wear, carbide damage, or abnormal face wear has reached an unacceptable level, continuing to use it can increase the load on the drill rod and other components.
A worn bit should be replaced with a specification suited to the same hole diameter, rock conditions, drilling method, and rock drill parameters—not simply with another bit using the same thread.
Replace the Drill Rod When…
Replace the drill rod when bending, thread damage, fatigue, severe wear, or loss of straightness compromises impact transmission or drilling stability.
Inspect the rod for:
- Visible bending or loss of straightness
- Damaged, worn, or deformed threads
- Cracks or suspected fatigue damage
- Severe thread connection wear
- Abnormal surface damage
- Repeated connection loosening
- Excessive vibration during drilling
- Evidence that the rod is unsuitable for the current hole depth or drilling conditions
A drill rod can look acceptable from a distance while having significant damage at the threaded connection. Thread areas are exposed to repeated impact and torsional loading and should therefore receive particular attention during inspection.
If a rod repeatedly breaks at the same location, do not treat the replacement rod as the complete solution. Check alignment, torque, feed force, hole depth, thread condition, and the compatibility of the complete drilling tools.
For deep-hole applications, rod straightness and stiffness become increasingly important. Continuing to use a bent or fatigued rod can accelerate wear on the bit and shank adapter and increase the risk of further failure.
Replace the Shank Adapter When…
Replace the shank adapter when its impact face, splines or threads, connection surfaces, or body show wear or damage that affects impact transfer or reliable connection with the drill rod.
Common replacement indicators include:
- Excessive wear on the impact face
- Damaged or worn threads or connection surfaces
- Significant spline wear, where applicable
- Cracks or visible structural damage
- Abnormal deformation
- Persistent loose connection with a correctly specified drill rod
- Abnormal vibration or noise originating from the shank connection
- Poor impact transmission despite normal rock drill operation
- Excessive heat or abnormal wear around the connection
The shank adapter is a critical interface between the rock drill and drill rod. Its condition directly affects how impact energy enters the drill rod.
Replacing the shank adapter also requires checking compatibility with the rock drill and drill rod. Installing a new shank adapter with an unsuitable rod or incorrect connection specification can simply reproduce the same problem.
Replace the Rock Drill When…
Consider replacing or overhauling the rock drill when the drilling system continues to show insufficient or unstable impact performance after the bit, rod, shank adapter, and operating parameters have been verified.
Possible indicators include:
- Persistent low impact energy or low penetration rate
- Unstable impact frequency
- Abnormal internal noise or vibration
- Reduced performance at the normal working pressure
- Excessive air leakage or pressure loss
- Abnormal oil consumption or lubrication problems
- Repeated damage to otherwise correctly matched drilling tools
- The rock drill cannot maintain the operating parameters required by the drilling application
However, a low penetration rate does not automatically mean that the rock drill needs replacement. Before making that decision, verify the bit, rod, shank adapter, rock conditions, rotation speed, feed force, working pressure, and flushing hole.
If correctly matched drilling tools still wear abnormally or drilling performance remains consistently below the expected level, the rock drill itself should then be inspected for internal wear or mechanical problems.
The replacement sequence should therefore be based on diagnosis rather than component age: inspect the Bit → Rod → Shank Adapter → Rock Drill, while also checking the drilling parameters and rock conditions.
FAQ About Rock Drill Bit, Rod, and Shank Matching
Can I use any drill bit with the same thread size?
No. The same thread specification does not automatically mean that every drill bit is interchangeable. You also need to verify the bit diameter, thread profile and dimensions, face design, carbide configuration, drilling method, rock conditions, and the capabilities of the rock drill.
For example, R32, T38, or T45 identifies a thread specification, not a complete drill bit selection. Two bits with the same thread can have different diameters or cutting structures and may be designed for different drilling conditions.
Does the drill rod thread have to match the shank adapter?
Yes. The drill rod connection must be compatible with the shank adapter, just as the rod thread must be compatible with the drill bit. The thread profile, pitch, dimensions, connection length, and mating surfaces all need to be verified.
The complete connection should therefore be checked as:
Rock Drill → Shank Adapter → Drill Rod → Rock Drill Bit
A rod that matches the bit but does not properly match the shank adapter is not a suitable rock drilling tools configuration.
How do I know which shank adapter fits my rock drill?
Start with the exact rock drill model and verify the shank adapter specification recommended for that drill. The shank adapter must match the rock drill’s connection and impact system, while its rod-side connection must also match the selected drill rod.
When the original model information is unavailable, provide your supplier with the rock drill model, drill rig model, existing shank adapter markings, drill rod thread, and photos of the connection. This information can help confirm the correct specification.
Can a larger drill bit improve drilling speed?
Not necessarily. A larger drill bit does not automatically increase penetration rate and may actually reduce drilling speed if the rock drill does not provide sufficient impact energy, feed force, rotation, or flushing capacity.
Bit diameter should be selected according to the required hole diameter and the drilling system’s capabilities. A larger diameter increases the amount of rock that must be broken and can require greater energy and more effective flushing.
The correct objective is not simply the largest possible bit, but the appropriate bit diameter for the hole, rock, and drilling equipment.
Why does my drill rod get hot during drilling?
A hot drill rod can indicate excessive friction, high torque, poor thread contact, insufficient lubrication, misalignment, excessive rotation speed, or abnormal drilling conditions. Some temperature increase during drilling is normal, but localized or rapidly increasing heat should be investigated.
Check:
- Thread condition and connection tightness
- Lubrication
- Rotation speed and torque
- Rod straightness
- Rock drill and rod alignment
- Hole condition
- Flushing performance
If the heat is concentrated around a threaded connection, inspect that connection first for abnormal contact or wear.
Why does a new rock drill bit have a low penetration rate?
A new bit can have a low penetration rate when the bit design, drilling parameters, drill rod, shank adapter, flushing hole, or rock conditions are not properly matched. A new bit only confirms that the cutting structure has not been used; it does not guarantee that the complete drilling system is correctly configured.
Check the system in this order:
Bit → Drill Rod → Shank Adapter → Rock Drill → Air/Water → Rock
Verify the bit diameter, thread, carbide configuration, impact energy, rotation speed, feed force, working pressure, flushing capacity, and actual rock conditions before concluding that the bit itself is defective.
Should I replace the drill bit and drill rod at the same time?
Not always. Replace the drill bit and drill rod independently when only one component has reached its service limit, but inspect both whenever abnormal wear or failure occurs.
For example, a worn bit does not necessarily require a new rod. However, if the rod has damaged threads, bending, fatigue cracks, or severe wear, installing a new bit on the damaged rod can shorten the new bit’s service life and reduce drilling performance.
When one component fails prematurely, check the complete drilling tools and drilling parameters before replacing individual parts.
What information should I provide when ordering drilling tools?
Provide enough information for the supplier to evaluate the complete drilling system, not just the desired bit or thread size. At minimum, provide:
- Drill rig and rock drill model
- Drilling method
- Hole diameter
- Hole depth
- Rock type
- Rock hardness and abrasiveness
- Drill rod thread
- Current shank adapter model or specification
- Working pressure
- Current drilling problems
Photos of the existing rock drill bit, drill rod threads, and shank adapter can also be useful when model or specification information is incomplete.
The more complete the information, the easier it is to recommend a compatible bit + drill rod + shank adapter combination and identify the likely cause of existing drilling problems.
Need help matching your drilling tools? Send us your drill rig model, hole diameter, rock conditions, and current drilling problem.