
Introduction
A low rock drilling penetration rate can quickly reduce drilling productivity and increase the cost per meter. If a drill rig takes longer than expected to reach the required depth, the problem may not be caused by the drill bit alone. Rock hardness and abrasiveness, bit condition, feed pressure, rotation speed, impact energy, flushing efficiency, drill rod condition, alignment, and overall equipment performance can all influence how efficiently energy is transferred into the rock.
In top hammer drilling, these factors work together. A worn or incorrectly selected drill bit can slow penetration, but so can excessive feed pressure, incorrect rotation speed, insufficient impact energy, poor hole flushing, or a worn drill rod. Simply increasing one operating parameter may therefore fail to improve drilling speed and can sometimes accelerate tool wear or equipment damage.
Low penetration rate is usually a system problem rather than simply a drill bit problem.
In this guide, we examine 10 common causes of low rock drilling penetration rate, explain the typical symptoms behind each problem, and provide practical ways to diagnose and improve drilling performance. By looking at the drill bit, rock formation, drilling parameters, flushing hole, drill rod, and drilling equipment as a complete system, operators can identify the real cause of slow drilling and improve both productivity and cost per meter.
What Is Rock Drilling Penetration Rate?
Rock drilling penetration rate measures how quickly a drilling system advances through rock during actual drilling. It is commonly expressed in meters per minute (m/min) or meters per hour (m/h) and is an important indicator of drilling productivity.
A higher penetration rate generally means that the drill rig can reach the required depth in less time. However, penetration rate should always be evaluated together with drill bit service life, drilling stability, energy consumption, and cost per meter. Simply increasing drilling speed does not necessarily mean that the overall drilling operation is more efficient.
Penetration Rate vs. Drilling Speed
The terms penetration rate and drilling speed are often used interchangeably, but they can refer to slightly different measurements depending on the drilling application.
- Penetration rate: The rate at which the drill bit advances into the rock while actively drilling.
- Drilling speed: A broader term that may describe how quickly the drilling operation progresses and can sometimes include overall operational performance.
- Meters per minute (m/min): A common unit used to express penetration rate during active drilling.
- Net drilling time: The actual time spent advancing the drill bit through the rock, excluding activities such as positioning, rod changes, hole cleaning, and other interruptions.
- Effective drilling rate: A practical measure of drilling productivity that considers the actual productive drilling time and, depending on the application, the overall drilling cycle.
For active drilling, the basic calculation is:
Penetration Rate = Drilled Depth ÷ Effective Drilling Time
For example, if a drill bit advances 10 meters in 5 minutes of actual drilling, the penetration rate is:
10 m ÷ 5 min = 2 m/min
This means the drill is advancing through the rock at an average rate of 2 meters per minute during active drilling.
However, operators should not evaluate drilling performance based only on the instantaneous penetration rate displayed by the drill rig. A drilling cycle may also include drill rig positioning, rod changes, hole cleaning, alignment, flushing, and other non-drilling activities.
For example, a rig may achieve a penetration rate of 2 m/min while actively drilling, but if significant time is spent changing drill rods or repositioning the rig, the overall meters drilled per hour can be much lower.
Therefore, when evaluating drilling efficiency, it is useful to distinguish between instantaneous penetration rate and overall drilling productivity. The goal is not simply to achieve the highest possible drilling speed, but to maintain a stable penetration rate while minimizing tool wear, downtime, and cost per meter.
Why Does Penetration Rate Matter in Rock Drilling?
Penetration rate is more than a measurement of how quickly a drill bit enters the rock. It directly affects drilling productivity, operating costs, tool consumption, and project schedules. When penetration slows down, the drilling rig must spend more time to complete the same number of meters, which can increase fuel or energy consumption, labor costs, equipment utilization, and downtime.
For this reason, drilling contractors should evaluate penetration rate together with cost per meter, productivity, and drill bit service life rather than focusing on drilling speed alone.
Higher Penetration Can Reduce Drilling Cost per Meter
When a drilling system maintains a stable and efficient penetration rate, less operating time is required to complete each meter of drilling. This can help reduce the amount of fuel, compressed air, electricity, and labor required per meter.
For example, if two drilling operations complete the same 100-meter hole but one maintains a higher effective penetration rate, the faster operation may require fewer operating hours to reach the target depth. This can improve equipment utilization and reduce the labor and energy costs associated with each drilled meter.
However, higher penetration is only beneficial when it does not significantly increase drill bit wear, rod damage, or equipment stress. The objective should be efficient penetration at an acceptable cost per meter, rather than maximum speed at any cost.
Low Penetration Increases Fuel, Air, and Labor Costs
A low penetration rate means that the drilling equipment has to operate for longer to complete the same amount of work.
Extended drilling time can result in:
- Higher fuel or electricity consumption
- Greater compressed-air consumption in pneumatic drilling systems
- Increased labor and operator costs
- More machine operating hours
- Higher maintenance requirements
- Greater exposure to equipment downtime
- Longer project completion times
The impact can become significant on projects involving thousands of meters of drilling. Even a relatively small reduction in average penetration rate can accumulate into substantial additional operating time and cost.
This is why cost per meter is often a more meaningful performance indicator than penetration rate alone.
Slow Drilling Can Also Indicate Equipment or Tool Problems
A sudden or gradual decrease in penetration rate can also be an early warning sign of a problem within the drilling system.
For example, slow penetration may be associated with:
- A worn or incorrectly selected drill bit
- Dull or damaged carbide buttons
- Incorrect feed pressure
- Improper rotation speed
- Insufficient impact energy
- Poor flushing and hole cleaning
- Worn drill rods or shank adapters
- Hydraulic or pneumatic system problems
- Poor drill alignment
- Changes in rock hardness or abrasiveness
Therefore, a declining penetration rate should not automatically be treated as a normal change in drilling conditions. Comparing current performance with previous drilling data can help operators identify abnormal changes before they lead to excessive tool wear or equipment failure.
The Connection Between Penetration Rate, Cost, Productivity, and Tool Life
These factors are closely connected:
Penetration Rate → Drilling Time → Productivity → Cost per Meter
At the same time:
Drilling Parameters → Penetration Rate → Tool Wear → Tool Life
For example, increasing feed pressure or impact energy may initially improve penetration, but if the settings are too aggressive for the rock formation or drill bit, they can accelerate carbide wear, damage drill rods, and shorten tool life. The resulting increase in tool consumption and downtime may offset any productivity gain.
The best drilling performance therefore comes from balancing penetration rate, drilling stability, tool life, and operating cost. When these factors are properly matched to the rock formation and drilling equipment, contractors can achieve more productive drilling without unnecessarily increasing tool consumption or equipment stress.
10 Common Causes of Low Rock Drilling Penetration Rate
The Rock Formation Is Harder or More Abrasive Than Expected
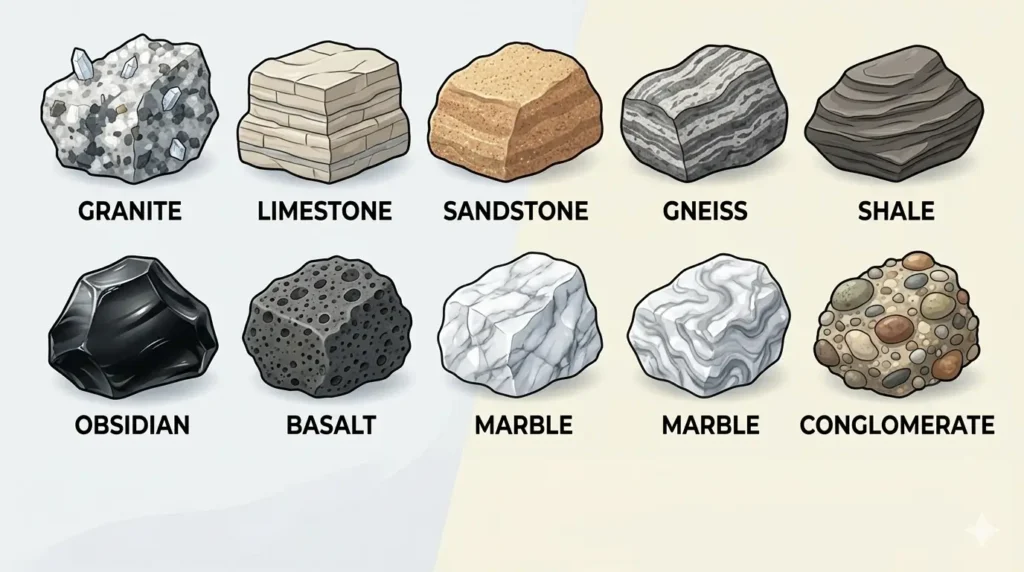
Rock formation is one of the most important factors affecting rock drilling penetration rate. A drilling system that performs well in one formation may penetrate much more slowly after entering a harder, more abrasive, or more complex rock layer.
Several rock properties can influence drilling performance, including compressive strength, hardness, abrasiveness, fracturing, and geological variation.
Compressive strength indicates how much force the rock can withstand before it fails. Higher-strength rock generally requires more effective impact energy to break. If the drilling system is not properly matched to the formation, more energy may be required to achieve the same penetration rate.
Rock hardness also affects how efficiently the drill bit can fracture the rock. Hard formations can require a different bit design, carbide button configuration, or operating parameter than softer formations.
Abrasiveness is another important factor. Highly abrasive rock can rapidly wear carbide buttons of the drill bit. As the bit becomes worn, its ability to transfer impact energy into the rock can decrease, causing penetration to gradually slow down.
Rock structure also matters. Fractured or jointed rock may sometimes drill faster because existing fractures provide natural planes of weakness. In contrast, massive and homogeneous rock can require more energy to fracture. Geological conditions can also change over a relatively short drilling distance, meaning that penetration rate may vary even within the same hole.
For this reason, a sudden reduction in penetration rate should not automatically be attributed to a problem with the drill rig or drill bit. The first question should be whether the drilling conditions have changed.
How to Fix It
If the rock formation is significantly harder or more abrasive than expected, consider the following approaches:
- Select a drill bit suited to the actual rock formation. Bit design, diameter, face configuration, and carbide button arrangement should match the hardness and abrasiveness of the rock.
- Choose an appropriate carbide button configuration. Different button shapes, sizes, and layouts can provide different levels of penetration performance, wear resistance, and rock-breaking efficiency.
- Adjust impact energy to the formation. Harder rock may require sufficient impact energy to achieve effective rock fragmentation, while excessive impact can accelerate tool wear if the drilling system is not properly matched.
- Optimize feed pressure and rotation speed. Drilling parameters should be adjusted as rock conditions change rather than using the same settings throughout the entire project.
- Improve flushing when necessary. Hard or highly fractured formations can generate significant quantities of cuttings, making effective hole cleaning important for maintaining penetration.
- Reassess the drilling method if conditions change substantially. In some formations, changing the drilling method or tooling configuration may provide better overall performance than simply increasing operating parameters.
Most importantly, the same drill bit will not necessarily achieve the same penetration rate in every rock formation. A bit that performs efficiently in moderately hard rock may penetrate much more slowly in high-strength or highly abrasive formations.
Therefore, when evaluating penetration rate, always consider the complete combination of rock properties, drill bit design, drilling parameters, and equipment capability rather than judging bit performance from penetration rate alone.

The Drill Bit Is Worn or Incorrectly Selected
The drill bit is the component that directly transfers impact energy into the rock, so its condition and design have a major influence on penetration rate. Even when the drilling rig and operating parameters are functioning normally, a worn or incorrectly selected bit can significantly reduce drilling performance.
One of the most common problems is worn carbide buttons. As the buttons become worn, their ability to concentrate impact energy and create effective fractures in the rock decreases. Blunt buttons can require more energy to achieve the same amount of rock breaking, causing penetration to gradually slow down.
However, wear is not the only issue. A drill bit may also perform poorly when its design does not match the drilling conditions. An incorrect button profile, unsuitable button arrangement, or insufficient gauge protection can reduce rock-breaking efficiency and accelerate wear. Selecting the wrong bit diameter or an unsuitable bit design for the rock formation can have a similar effect.
For example, a bit designed primarily for high wear resistance may not provide the fastest penetration in a particular formation, while a design optimized for aggressive penetration may wear too quickly in highly abrasive rock. The best choice depends on the balance between penetration, durability, rock properties, and drilling parameters.
Symptoms of a Worn or Incorrectly Selected Drill Bit
Several field symptoms can indicate that the drill bit is contributing to a low penetration rate:
- Penetration gradually decreases as carbide buttons become worn or the bit loses its original cutting profile.
- Hole diameter becomes inconsistent, particularly when the gauge area or gauge buttons are excessively worn.
- Excessive vibration occurs because the bit is no longer breaking the rock efficiently or maintaining stable contact with the hole bottom.
- Higher drilling pressure is required to maintain the same penetration rate.
- Energy consumption increases because more energy is required to achieve the same drilling progress.
- Bit wear becomes excessive, especially when the bit design or carbide configuration is poorly matched to the rock formation.
A gradual reduction in penetration rate is particularly useful as a maintenance signal. If drilling conditions and machine settings remain relatively stable while penetration steadily declines, inspecting the drill bit should be one of the first diagnostic steps.
How to Fix It
Start by establishing a regular drill bit inspection and wear monitoring routine. Check the condition of the carbide buttons, bit face, gauge buttons, flushing holes, and other critical surfaces rather than judging the bit only by its appearance.
When selecting a replacement bit, consider the actual drilling conditions, including:
- Rock hardness and compressive strength
- Rock abrasiveness
- Hole diameter
- Drilling method
- Required penetration rate
- Expected bit life
- Impact system and drilling parameters
The bit design and carbide button configuration should be matched to the rock formation. If the formation changes, the optimal bit design may also need to change.
Worn bits should be reconditioned or replaced at the appropriate point according to their condition and the manufacturer’s recommendations. Continuing to use a severely worn bit simply to obtain a few additional meters can be counterproductive. Once excessive wear causes penetration to fall significantly, the additional drilling time, energy consumption, and stress on the drilling system may cost more than replacing the bit.
The objective is therefore not to use a drill bit for the maximum possible number of meters, but to achieve the best balance between penetration rate, bit life, drilling stability, and cost per meter.
For more information on evaluating bit condition and quality, see our related guides on how to identify a high-quality rock drill bit .
Feed Pressure Is Too Low or Too High
Feed pressure is the force that pushes the drill bit against the rock during drilling. It plays an important role in maintaining contact between the drill bit and the rock and allowing impact energy to be transferred effectively into the formation.
However, more feed pressure does not automatically mean faster drilling. If the pressure is too low, the bit may not maintain stable contact with the rock. If it is too high, excessive force can increase tool wear, torque, vibration, and mechanical stress.
The correct feed pressure depends on the interaction between the rock formation, drill bit, impact system, drill rod, and drilling equipment.
If Feed Pressure Is Too Low
When feed pressure is insufficient, the drill bit may not remain firmly and consistently engaged with the rock. Part of the impact energy can therefore be used inefficiently instead of contributing to rock fragmentation.
Typical symptoms include:
- Poor penetration
- Excessive bit bouncing
- Unstable drilling
- Increased vibration
- Irregular impact and drilling sounds
- Difficulty maintaining a consistent penetration rate
In hard rock, insufficient feed pressure can be particularly noticeable because the bit requires adequate contact force to make effective use of the available impact energy.
If Feed Pressure Is Too High
Excessive feed pressure can create a different set of problems. Instead of improving rock breaking, excessive force can overload the drilling system and increase mechanical stress.
Possible consequences include:
- Excessive drill bit wear
- Increased rotation torque
- Drill rod bending or excessive stress
- Increased vibration
- Poor drilling efficiency
- Premature wear or failure of drilling components
High feed pressure can also mask the actual cause of low penetration. For example, if a worn drill bit is penetrating slowly, simply increasing feed pressure may temporarily change the drilling response but can accelerate carbide wear and damage the drill rod.
How to Optimize Feed Pressure
The correct approach is to adjust feed pressure according to the actual drilling conditions rather than applying a fixed value to every application.
Feed pressure should match the rock formation, drill bit, impact system, and drilling equipment.
When optimizing the setting, monitor several factors together:
- Rock formation — Harder or more fractured rock may respond differently to changes in feed pressure.
- Drill bit condition — A worn bit may require different operating conditions, but excessive pressure should not be used to compensate for severe wear.
- Impact energy — Feed pressure needs to support effective impact energy transfer without overloading the system.
- Rotation speed — Feed and rotation should be balanced to maintain stable bit movement across the hole bottom.
- Drilling tools condition — Excessive pressure can increase stress on rods, couplings, and shank adapters.
- Drilling stability — Excessive vibration, bouncing, or abnormal torque can indicate that the current settings are not properly matched.
Rather than asking “What is the highest feed pressure I can use?”, operators should ask “What feed pressure provides stable penetration with acceptable bit wear and equipment load?”
The optimal setting is the one that maintains a stable penetration rate, effective energy transfer, controlled tool wear, and reliable drilling performance.
Rotation Speed Is Not Properly Matched to the Drill Bit
In top hammer drilling, rotation speed determines how the drill bit is indexed between successive impacts. The drilling process relies on several actions working together:
Impact → Rotation → Feed → Rock Breaking
The impact mechanism delivers energy to the bit, rotation moves the bit to a new position for the next impact, and feed pressure maintains contact between the bit and the rock. When these parameters are properly matched, successive impacts can break fresh areas of rock efficiently and maintain stable penetration.
If rotation speed is not properly matched to the drill bit and impact system, however, the bit may not use the available impact energy efficiently. Both excessively low and excessively high rotation speeds can reduce drilling performance.
When Rotation Speed Is Too Low
If the bit rotates too slowly, successive impacts may be applied too close to previously impacted areas. The bit may therefore fail to distribute impacts efficiently across the hole bottom.
This can result in:
- Inefficient bit indexing
- Poor rock-breaking coverage
- Repeated impacts on already fractured areas
- Unstable penetration
- Increased vibration in some drilling conditions
- Reduced overall drilling efficiency
In this situation, simply increasing feed pressure may not solve the problem because the bit still does not rotate sufficiently to make effective use of each impact.
When Rotation Speed Is Too High
Excessive rotation can also reduce drilling efficiency. When the bit rotates faster than the drilling system and formation require, the cutting structure may spend more time rubbing and scraping the rock rather than making efficient use of impact energy.
Possible consequences include:
- Excessive drill bit wear
- Increased friction
- Higher heat generation
- Increased rotation torque or power demand
- Accelerated wear of carbide buttons and gauge buttons
- Reduced drilling efficiency
High rotation speed can be particularly unfavorable when combined with aggressive feed pressure or abrasive rock, as the additional mechanical load can accelerate drill bit and drill rod wear.
How to Optimize Rotation Speed
There is no single rotation speed that is ideal for every rock drilling application. The appropriate setting should be determined by the complete drilling system, including:
- Bit diameter
- Rock formation
- Drill bit design
- Carbide button configuration
- Impact frequency
- Feed pressure
- Drilling method
- Drill rig and rock drill characteristics
As a general principle, larger-diameter bits, harder or more abrasive formations, and different impact systems may require different rotation settings. The objective is to provide enough rotation for efficient bit performance without creating unnecessary friction and wear.
Operators should monitor penetration rate together with rotation torque, vibration, bit wear, and drilling stability. If increasing rotation speed does not improve penetration but causes faster bit wear or higher torque, the setting may already be beyond the efficient operating range.
The best rotation speed is therefore not necessarily the highest available speed. It is the speed that allows the drill bit to effectively break rock between impacts, maintain good rock-breaking coverage, and work efficiently with the selected feed pressure and impact energy.
Impact Energy or Percussion Performance Is Insufficient
Impact energy is one of the most important sources of rock-breaking power in top hammer drilling. During each impact cycle, the rock drill generates mechanical energy that is transmitted through the shank adapter, drill rod, and drill bit to the rock. If the impact system cannot deliver sufficient or consistent energy, the bit may struggle to fracture the rock effectively, resulting in a low penetration rate.
Insufficient percussion performance does not necessarily mean that the drill bit is worn. A sharp, properly selected bit can still penetrate slowly if the rock drill does not generate enough impact energy or if energy is lost before it reaches the bit.
Several factors can contribute to insufficient impact performance, including:
- Insufficient rock drill output
- Low hydraulic pressure or inadequate hydraulic flow in hydraulic drilling systems
- Insufficient pneumatic pressure or air supply in pneumatic systems
- Wear in the impact mechanism
- Damaged or worn internal components
- Inefficient energy transmission through the shank adapter, drill rods, couplings, or other connections
- Poor lubrication or inadequate maintenance
Symptoms of Insufficient Impact Performance
A reduction in impact performance can often be identified through changes in drilling behavior. Common symptoms include:
- Low penetration despite a sharp and properly selected drill bit
- Abnormally weak, irregular, or changed impact sound
- Unstable drilling performance
- Increased vibration
- Higher drilling time without a corresponding change in rock conditions
- Difficulty maintaining the normal penetration rate under previously effective settings
If penetration drops while the bit remains in good condition and the rock formation has not changed, the impact system should be inspected before simply increasing feed pressure or rotation speed.
How to Fix It
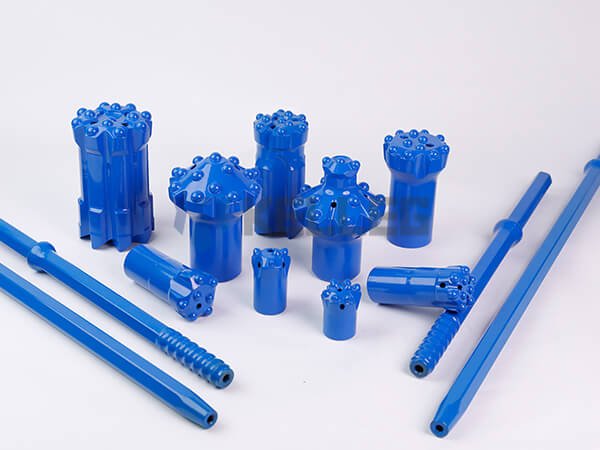
Start by checking the complete percussion and energy-transmission system rather than adjusting a single operating parameter.
1. Inspect the Rock Drill
Check whether the rock drill is producing its expected impact performance. Internal wear or damage can reduce impact energy and make drilling less stable.
2. Check the Hydraulic or Pneumatic System
For hydraulic rock drills, verify the relevant hydraulic pressure, flow, and system performance.
For pneumatic rock drills, check whether the compressor and air supply can maintain the required operating pressure and airflow under actual drilling conditions.
3. Check Impact Pressure and Frequency
Abnormal impact pressure or impact frequency can indicate a problem with the percussion system or its operating conditions. These parameters should be compared with the equipment manufacturer’s recommended operating range.
4. Inspect Seals and Internal Wear Components
Worn seals, pistons, valves, cylinders, or other percussion components can reduce the efficiency and consistency of impact energy generation. Replace components when their condition falls outside the manufacturer’s service requirements.
5. Check Lubrication
Adequate lubrication is essential for pneumatic and mechanical impact components. Insufficient or improper lubrication can increase friction and accelerate internal wear, potentially reducing percussion performance.
6. Inspect the Energy Transmission Path
Impact energy must travel through the entire drilling tool:
Rock Drill → Shank Adapter → Drill Rod → Drill Bit → Rock
Worn threads, damaged connections, bent rods, or worn shank adapters can reduce effective energy transmission and contribute to vibration or poor penetration.
The key point is that impact energy should be sufficient, stable, and efficiently transferred to the rock. If penetration remains low despite a suitable drill bit and properly adjusted feed and rotation parameters, inspecting the percussion system and energy-transmission components can help identify the underlying problem.
Poor Flushing Removes Rock Cuttings Inefficiently
Rock drilling does not end when the drill bit breaks the rock. The fragmented rock, or drill cuttings, must also be removed efficiently from the bottom of the hole. This is the primary role of the flushing hole.
When flushing is insufficient, cuttings can accumulate around the drill bit instead of being carried out of the hole. The bit may then repeatedly impact already-broken material rather than fresh rock, reducing the amount of useful energy available for further rock fragmentation.
Poor flushing can therefore create a chain reaction:
Poor Flushing → Cuttings Accumulation → Reduced Rock-Breaking Efficiency → Lower Penetration Rate → Increased Bit Wear
In severe cases, inefficient hole cleaning can also make drilling less stable and increase the risk of excessive bit and drill rod wear.
How Poor Flushing Reduces Penetration Rate
Insufficient flushing can affect drilling performance in several ways:
- Cuttings accumulate at the hole bottom, preventing the bit from making consistent contact with fresh rock.
- The bit may repeatedly impact broken material, reducing the effectiveness of each impact.
- Penetration rate decreases because less impact energy contributes to breaking new rock.
- Drill bit wear increases as the bit works against accumulated cuttings and experiences additional friction.
- Hole cleaning becomes less effective, which can further reduce drilling efficiency as hole depth increases.
The problem may become more noticeable in deeper holes or formations that generate large quantities of fine or coarse cuttings. In these conditions, the flushing hole must be capable of continuously transporting the cuttings out of the hole.
How to Improve Flushing and Hole Cleaning
If penetration rate decreases while the drill bit and other operating parameters appear normal, inspect the complete flushing path.
Check the Flushing Medium
Determine whether the selected flushing medium is appropriate for the drilling method and formation. Depending on the application, drilling may use compressed air, water, or another suitable flushing arrangement.
Check Air or Water Flow
Insufficient flow can prevent cuttings from being removed effectively. Check for abnormal changes in the available air or water supply and verify that the system can maintain adequate flow under actual drilling conditions.
Check Flushing Pressure
Low or unstable flushing pressure can reduce the ability of the system to transport cuttings through the hole. Check pressure with flow rather than evaluating it in isolation.
Check for Blocked Passages
Inspect the flushing circuit for restrictions, contamination, damaged components, or other blockages that could reduce the effective flow reaching the drill bit.
Inspect Drill Bit, Flushing Holes
Blocked or damaged flushing holes can significantly affect the distribution of the flushing medium at the bit face. Clean and inspect the passages regularly.
Drill Rods or Shank Adapters Are Worn or Damaged
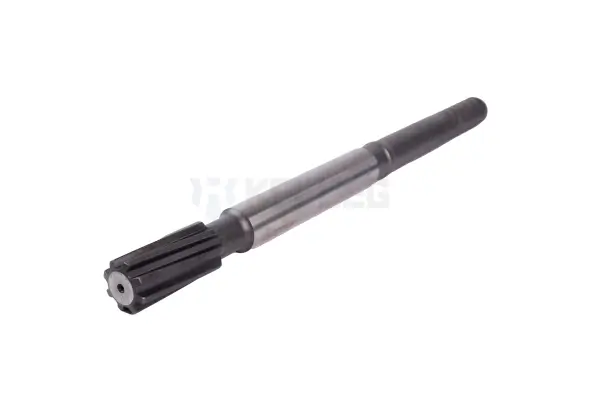
In top hammer drilling, the drill bit is only one part of the energy transmission system. Impact energy generated by the rock drill must travel through several connected components before it reaches the rock.
The basic energy transmission path is:
Rock Drill → Shank Adapter → Coupling → Drill Rod → Drill Bit → Rock
If any component in this chain is worn, damaged, incorrectly connected, or poorly aligned, some impact energy may be lost before it reaches the drill bit. As a result, the drill may show a lower penetration rate even when the bit itself is in good condition.
Common Drilling Tools Problems
Several conditions can affect energy transmission and drilling stability.
Worn threads can prevent components from maintaining the intended connection and contact between mating surfaces. Excessive thread wear may also increase vibration and reduce connection reliability.
Damaged threads can result from improper make-up, excessive torque, contamination, impact damage, or prolonged use. Damaged threads may prevent the drill rod, coupling, or shank adapter from connecting correctly.
Bent drill rods can cause misalignment between the rock drill and the drill bit. This can increase vibration, reduce drilling stability, accelerate tool wear, and interfere with efficient energy transmission.
Poor thread connection can also affect drilling performance. If connections are not properly made up, impact energy may not be transferred efficiently through the drill rod.
A worn shank adapter can have a similar effect. Because the shank adapter connects the rock drill to the rest of the drill rod, excessive wear in this component can affect impact transmission, rotation, and overall drilling stability.
Why Drill Rod Condition Matters

Top hammer drilling depends on efficient transmission of impact energy from the rock drill to the rock. The drill rod does not simply act as an extension of the drill; it is an important part of the energy-transfer path.
When the connection surfaces and components are in good condition, impact energy can be transmitted efficiently through the drill rod. When components are worn, damaged, bent, or improperly connected, energy losses and vibration can increase.
This can contribute to:
- Lower penetration rate
- Increased vibration
- Higher drilling noise
- Faster drill bit wear
- Increased thread wear
- Drill rod damage or bending
- Reduced drilling stability
- Higher operating and maintenance costs
Therefore, when penetration decreases without an obvious change in the rock formation or drill bit condition, the drill rods, couplings, and shank adapter should also be inspected.
How to Check and Maintain the Drill Rod
Regular inspection can help identify problems before they significantly affect drilling performance.
Check Thread Condition
Inspect the threads on drill rods, couplings, and shank adapters for:
- Excessive wear
- Deformation
- Cracks
- Damaged thread profiles
- Unusual contact or wear patterns
Threads should be cleaned and maintained according to the tooling manufacturer’s recommendations.
Check Drill Rod Straightness
Bent or deformed rods can affect hole alignment and increase vibration. Inspect rods regularly, particularly after abnormal drilling conditions, excessive torque, or accidental impacts.
Inspect Couplings
Check coupling threads and contact surfaces for excessive wear or damage. A worn coupling can affect the connection between drill rods and contribute to energy loss or unstable drilling.
Check Shank Adapter Wear
Because the shank adapter receives direct impact from the rock drill, its wear condition should be monitored regularly. Excessive wear can affect both impact and rotation transmission.
Check Connection Tightness
Ensure that threaded connections are properly made up according to the tooling and equipment manufacturer’s requirements. A connection that is too loose can reduce energy transmission and cause premature thread damage, while improper tightening can also create unnecessary stress.
The key point is that the condition of drilling tools directly affects the efficiency and stability of the entire top hammer drilling. If the drill bit is sharp but penetration remains low, inspecting the complete energy transmission path can help identify problems that may otherwise be overlooked.
Drilling Parameters Are Not Properly Matched
Rock drilling performance depends on several operating parameters working together. Even when each parameter appears reasonable on its own, an inappropriate combination can result in low penetration rate, excessive tool wear, or unstable drilling.
The main parameters that need to be considered together include:
- Feed pressure
- Rotation speed
- Impact frequency
- Impact pressure
- Flushing
- Torque
These parameters are closely connected. For example, feed pressure determines how firmly the bit is maintained against the rock, while rotation speed determines how efficiently the bit indexes between impacts. Impact pressure and frequency influence the energy delivered to the rock, and effective flushing removes the broken cuttings so that the bit can continue working on fresh rock.
This means that changing one parameter in isolation does not necessarily improve penetration.
Increasing feed pressure does not always increase penetration rate.
For example, if penetration is low because the drill bit is worn or impact energy is insufficient, simply increasing feed pressure may increase mechanical load without solving the underlying problem. Similarly, increasing rotation speed may increase friction and bit wear if the impact system and rock formation are not suited to the higher speed.
The correct approach is to match the drilling parameters to the rock formation, drill bit, impact system, and drilling equipment as a complete system.
How to Optimize Drilling Parameters
When penetration rate is lower than expected, avoid making large changes to several parameters at the same time. Instead:
- Check the rock formation and determine whether hardness or abrasiveness has changed.
- Inspect the drill bit to make sure wear is not limiting penetration.
- Check feed pressure and look for signs of bouncing, excessive vibration, or overloading.
- Check rotation speed to ensure the bit is indexing effectively between impacts.
- Verify impact pressure and frequency against the equipment’s recommended operating range.
- Check flushing performance to ensure cuttings are removed efficiently.
- Monitor torque and vibration for signs of excessive mechanical load or unstable drilling.
The objective is not to maximize any single parameter. It is to find an operating combination that provides stable penetration, efficient rock breaking, controlled tool wear, and acceptable cost per meter.
The Drill Rig Has Mechanical or Hydraulic Problems
Not every reduction in penetration rate is caused by the drill bit or drilling parameters. The drilling rig itself can become the limiting factor, particularly when hydraulic, pneumatic, feed, or impact systems are not performing as expected.
Mechanical or hydraulic problems can reduce the power available to the drilling system or prevent that power from being delivered consistently to the rock.
Potential causes include:
- Hydraulic pressure loss
- Insufficient pump output
- Worn hydraulic components
- Unstable feed system
- Damaged or worn impact mechanism
- Insufficient available power
- Drilling boom instability
- Internal leakage or other system performance issues
For example, a hydraulic system may show normal performance under some operating conditions but experience pressure or flow losses when the drilling system is under load. This can result in reduced impact performance, slower feed movement, or unstable drilling.
A worn feed system can also make it difficult to maintain consistent contact between the drill bit and the rock. Similarly, problems with the impact mechanism can reduce the amount or consistency of energy reaching the drilling tools.
How to Diagnose Drill Rig Problems
If penetration rate suddenly decreases and the drill bit and rock conditions appear unchanged, inspect the equipment systematically:
- Check machine pressure and compare current readings with normal operating conditions.
- Inspect the hydraulic or pneumatic system for pressure loss, insufficient flow, leakage, or other abnormalities.
- Check the feed system for unstable movement, insufficient feed force, or mechanical wear.
- Inspect the impact system for abnormal sounds, reduced impact performance, or worn components.
- Compare current drilling data with normal operating data, including penetration rate, pressure, torque, vibration, and other available machine readings.
Historical operating data can be particularly useful. If the same drill rig previously achieved a significantly higher penetration rate under similar rock conditions and tooling, a machine-related problem should be considered rather than immediately changing the drill bit.
Poor Hole Alignment or Unstable Drilling Conditions
Hole alignment is sometimes overlooked when diagnosing low penetration rate, but poor alignment and unstable drilling can reduce energy-transfer efficiency and accelerate wear throughout the drilling system.
During top hammer drilling, the drill rod should remain properly aligned with the intended hole. If the drill rod is misaligned or the drill rig is positioned incorrectly, the drill rod may experience additional bending, vibration, and friction.
Potential causes include:
- Drill rod misalignment
- Excessive vibration
- Unstable feed movement
- Improper drill rig positioning
- Hole deviation
- Uneven or unstable rock surfaces
- Bent drill rods or worn connection components
Poor alignment can produce several secondary problems. Increased vibration can accelerate drill bit and thread wear, while bending forces can increase stress on drill rods. Energy that should be transferred into the rock may instead be lost through vibration, friction, or deformation.
Common signs may include:
- Unstable penetration rate
- Excessive vibration
- Abnormal drilling noise
- Rapid or uneven bit wear
- Increased drill rod wear
- Hole deviation
- Difficulty maintaining consistent feed pressure
How to Improve Drilling Stability and Alignment
To reduce alignment-related penetration problems:
- Position the drill rig correctly before starting the hole.
- Maintain proper alignment between the rock drill, drilling tool, and planned hole direction.
- Control feed pressure to avoid excessive force or unstable bit contact.
- Inspect drill rods regularly for bending, deformation, or abnormal wear.
- Check couplings and shank adapters for wear that could contribute to misalignment.
- Reduce excessive vibration by optimizing drilling parameters and correcting mechanical problems.
- Maintain a stable drilling platform whenever possible, particularly when working on uneven or unstable surfaces.
A stable and properly aligned drilling system allows impact energy to reach the rock more efficiently and helps maintain consistent contact between the drill bit and the hole bottom.
Ultimately, low penetration rate should be evaluated as a complete drilling-system problem. Rock conditions, bit selection, drilling parameters, flushing, equipment performance, and hole alignment can all interact. Identifying the actual limiting factor is more effective than simply increasing one operating parameter.
How to Diagnose Low Rock Drilling Penetration Rate
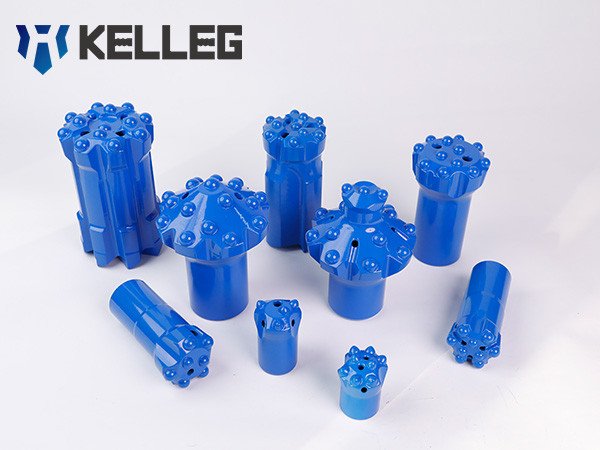
When rock drilling penetration rate drops, changing the drill bit immediately is not always the best solution. A systematic troubleshooting process can help identify whether the problem is caused by changing rock conditions, tool wear, drilling parameters, equipment performance, or alignment.
The following six-step process can help operators narrow down the cause of slow drilling.
Step 1: Check the Rock Formation
First, determine whether the drilling conditions have changed.
Ask:
- Has the drill entered a different rock layer?
- Is the current formation harder than the previous section?
- Has rock abrasiveness increased?
- Has the rock become more massive or less fractured?
- Are there noticeable changes in geological conditions?
If penetration decreases immediately after entering a different formation, the change in rock properties may be the primary cause rather than a mechanical problem.
Step 2: Inspect the Drill Bit
If the rock formation has not changed significantly, inspect the drill bit.
Check the condition of:
- Carbide buttons — Look for excessive wear, blunt profiles, cracking, or abnormal wear patterns.
- Bit face — Check for damage, cracks, or deformation.
- Gauge buttons — Excessive gauge button wear can affect hole diameter and drilling stability.
- Flushing holes — Make sure they are not blocked or damaged.
Compare the current bit condition with a new or normally performing bit whenever possible.
Step 3: Check Drilling Parameters
Next, record the actual drilling parameters rather than relying only on operator impressions.
Important parameters include:
- Feed pressure
- Rotation speed
- Impact pressure
- Impact frequency, where available
- Flushing pressure
- Flushing flow, where measurable
- Rotation torque, where available
Compare the current values with the normal operating range for the specific drill rig, rock drill, bit, and drilling application.
Avoid changing several parameters simultaneously. Making one controlled adjustment at a time makes it easier to determine which parameter is affecting penetration rate.
Step 4: Inspect the Other Drilling Tools
If the bit and drilling parameters appear normal, inspect the rest of the drilling tools.
Check:
- Drill rods for bending, deformation, cracks, and excessive wear
- Couplings for thread damage and abnormal wear
- Shank adapter for excessive wear or damage
- Thread connections for proper condition and engagement
- Overall alignment and connection condition
A worn or damaged component can reduce impact and rotation transmission even when the drill bit itself is in good condition.
Step 5: Check the Drill Rig
If the drilling tools are functioning normally, the drill rig should be inspected.
Pay particular attention to:
- Hydraulic system
- Impact system
- Feed system
- Rotation system
- Flushing system
- Drilling alignment
Look for pressure loss, unstable feed movement, abnormal impact performance, excessive vibration, or other changes from normal machine behavior.
A sudden decrease in penetration rate without a corresponding change in rock conditions or tool condition can be a useful indication that the equipment itself requires inspection or maintenance.
Step 6: Compare Performance Data
Finally, compare the current drilling performance with historical or expected data.
A useful comparison is:
Current Penetration Rate vs. Historical/Expected Penetration Rate
For example, compare drilling data from:
- The same drill rig
- Similar rock formations
- The same hole diameter
- The same drill bit type
- Similar drilling parameters
Also consider tracking:
- Meters drilled per shift
- Bit life
- Drilling time per hole
- Downtime
- Cost per meter
- Tool consumption
This comparison helps distinguish a normal reduction caused by changing geological conditions from an abnormal performance decline caused by tool wear, incorrect parameters, or equipment problems.
A Practical Troubleshooting Sequence
In practice, the diagnostic process can be summarized as:
Rock Formation → Drill Bit → Drilling Parameters → Other Drilling Tools → Drill Rig → Performance Data
This sequence helps prevent unnecessary tool replacement or parameter changes before the actual cause has been identified.
Most importantly, look for changes in multiple indicators at the same time. For example, a falling penetration rate combined with increased torque and obvious bit wear points toward a tooling problem, while a sudden penetration drop accompanied by abnormal hydraulic pressure may indicate an equipment issue.
By comparing drilling conditions, tool condition, operating parameters, and historical performance together, operators can identify the real cause of low penetration rate more reliably and make targeted adjustments instead of relying on trial and error.
How to Improve Rock Drilling Penetration Without Increasing Tool Wear
Improving rock drilling penetration rate does not always mean increasing feed pressure, rotation speed, or impact energy. Aggressive drilling parameters may produce a short-term increase in penetration, but they can also accelerate drill bit wear, increase vibration, damage drill rods, and raise the overall cost per meter.
A more effective approach is to optimize the entire drilling system. The rock drilling tools, rock formation, impact system, feed pressure, rotation speed, flushing, and drill rig should work together to maintain stable and efficient rock breaking.
Match the Drill Bit to the Rock Formation
The first step is to make sure the drill bit is suitable for the actual drilling conditions.
Rock hardness, compressive strength, abrasiveness, fracture characteristics, hole diameter, and drilling method can all influence bit performance. A bit that performs well in one formation may deliver a much lower penetration rate in another.
The appropriate bit design and carbide button configuration should therefore be selected according to the rock formation and required drilling performance.
However, bit selection should not focus on penetration rate alone. A highly aggressive bit may initially drill faster but wear quickly in abrasive rock, while a more wear-resistant design may provide better overall performance over a longer drilling cycle.
The objective is to achieve a practical balance between:
Penetration Rate + Bit Life + Drilling Stability + Cost per Meter
For detailed guidance on evaluating and selecting rock drill bits, refer to our related articles on rock drill bit selection and quality inspection.
Optimize the Entire Drilling Parameter Set
Drilling parameters should be adjusted as a complete system rather than individually.
The main parameters include:
- Feed pressure
- Rotation speed
- Impact pressure
- Impact frequency
- Flushing pressure and flow
- Rotation torque
These factors interact with each other. For example, increasing feed pressure may improve bit contact with the rock when the pressure is too low, but excessive feed pressure can increase torque, vibration, and bit wear.
Likewise, increasing rotation speed does not necessarily increase penetration. If the bit rotates too quickly for the impact frequency, bit design, or rock formation, additional rotation may mainly increase friction and wear.
A better approach is to make controlled adjustments while monitoring penetration rate, torque, vibration, impact performance, and tool wear.
Do not optimize one drilling parameter in isolation. Optimize the drilling system as a whole.
The correct settings should always be determined according to the specific drill rig, rock drill, rock drilling tools, and rock formation rather than applying one fixed parameter to every application.
Reduce Energy Loss Through the Drilling System
Efficient rock drilling depends not only on how much energy the rock drill generates, but also on how efficiently that energy reaches the rock.
In a typical top hammer drilling, the energy transmission path is:
Rock Drill → Shank Adapter → Coupling → Drill Rod → Drill Bit → Rock
Worn threads, damaged couplings, bent drill rods, excessive shank adapter wear, poor connections, or drilling misalignment can reduce transmission efficiency and increase vibration.
As a result, a drill rig may appear to have sufficient power while the actual energy delivered to the rock is lower than expected.
Regularly inspect the condition of:
- Shank adapters
- Couplings
- Drill rods
- Thread connections
- Drill bit connections
- Alignment of the drill rod
Maintaining the entire drilling tool chain in good condition can help improve energy transfer, reduce vibration, extend tool life, and maintain a more stable penetration rate.
Monitor Penetration Rate, Tool Life and Cost per Meter Together
The highest penetration rate is not always the most economical drilling performance.
For example, increasing drilling parameters may raise penetration from 1.8 m/min to 2.2 m/min, but if the change causes the drill bit to wear significantly faster, increases rod damage, or creates additional downtime, the overall cost of drilling may actually increase.
For this reason, operators should monitor several indicators together:
| Performance Indicator | What It Shows |
|---|---|
| Penetration rate | How quickly the bit advances through the rock |
| Bit life | How many meters the bit can drill before replacement |
| Tool consumption | How frequently drilling tools need to be replaced |
| Downtime | Time lost to maintenance, tool changes, or equipment problems |
| Energy consumption | Fuel, electricity, or compressed air used during drilling |
| Cost per meter | Overall economic efficiency of the drilling operation |
The ultimate goal is not simply:
Higher Penetration Rate
but:
Higher Effective Penetration + Stable Tool Life + Lower Cost per Meter
A well-optimized drilling system should maintain a consistent penetration rate without placing unnecessary stress on the drill bit, drill rod, or drilling equipment.
In other words, drilling faster is valuable only when the additional productivity is greater than the additional cost and tool wear it creates.
Does a Faster Penetration Rate Always Mean Better Drilling Performance?
No. A higher penetration rate does not always mean better drilling performance.
Penetration rate is an important indicator of drilling productivity, but maximizing it without considering the rest of the drilling system can create additional problems. For example, increasing feed pressure, rotation speed, or impact energy may produce a temporary increase in penetration, but excessive operating parameters can place unnecessary stress on the drill bit, drill rod, and drilling equipment.
Overly aggressive drilling can lead to:
- Accelerated drill bit wear
- Drill rod or thread damage
- Excessive vibration
- Higher fuel, electricity, or compressed-air consumption
- Increased maintenance requirements
- Premature equipment failure
- Higher overall cost per meter
For example, a drilling system that achieves a very high penetration rate but requires frequent bit replacement may be less economical than a system with a slightly lower penetration rate and significantly longer tool life.
What Should You Optimize Instead?
The goal should not simply be to achieve the highest possible penetration rate. Instead, operators should aim for an optimal penetration rate with stable drilling performance and an acceptable cost per meter.
A practical evaluation should consider:
Penetration Rate + Tool Life + Drilling Stability + Energy Consumption + Downtime → Overall Drilling Efficiency
When these factors are balanced, the drilling system can maintain productive penetration while controlling tool consumption, equipment stress, and operating costs.
The best drilling performance is not the fastest drilling speed—it is the most efficient combination of penetration, tool life, stability, and cost.
This is why penetration rate should always be evaluated together with bit wear, drill rod condition, equipment performance, and cost per meter, rather than used as a standalone measure of drilling efficiency.
Rock Drilling Penetration Rate Troubleshooting Checklist
When penetration rate is lower than expected, identifying the pattern of the problem can help narrow down the possible cause more quickly. The following checklist provides a practical starting point for troubleshooting common rock drilling performance issues.
| Symptom | Possible Cause | What to Check |
|---|---|---|
| Bit penetrates slowly from the beginning | Wrong bit selection or harder-than-expected rock | Rock formation, rock hardness, bit design, carbide button configuration |
| Penetration gradually decreases | Drill bit wear | Carbide buttons, bit face, gauge buttons condition, wear pattern |
| Sudden loss of penetration | Equipment or impact problem | Impact performance, hydraulic/pneumatic system, pressure and flow |
| High vibration during drilling | Incorrect feed/rotation settings, misalignment, or worn tools | Feed pressure, rotation speed, drill rod straightness, alignment |
| Poor hole cleaning | Insufficient flushing | Air/water flow, flushing pressure, bit flushing holes |
| High drill rod wear | Misalignment, excessive torque, or unstable drilling | Drill rod straightness, thread condition, coupling, alignment, torque |
| Drill bit wears very quickly | Abrasive rock or incorrect drilling parameters | Rock abrasiveness, bit design, feed pressure, rotation speed, impact settings |
| Low penetration despite good bit condition | Insufficient impact energy or poor energy transmission | Rock drill, hydraulic/pneumatic system, shank adapter, drill rods |
| Hole diameter becomes inconsistent | Gauge wear, misalignment, or unstable drilling | Gauge buttons, bit condition, drill rod alignment |
| Penetration is unstable throughout drilling | Changing rock conditions or inconsistent drilling parameters | Rock formation, feed pressure, impact performance, flushing, vibration |
How to Use This Checklist
The most useful approach is to look at when and how the penetration rate changes.
If penetration is low from the beginning, investigate rock conditions and drill bit selection first. If penetration gradually declines, bit wear or changing geological conditions may be more likely. A sudden drop is more likely to indicate an equipment, impact, hydraulic, or flushing problem.
When several symptoms appear together, avoid changing only one drilling parameter. For example, low penetration + high vibration + rapid rod wear may indicate a deeper alignment or drilling stability problem rather than simply insufficient feed pressure.
Use this checklist as a starting point, then inspect the rock formation → drill bit → drilling parameters → drilling tools → drill rig → alignment in sequence. This systematic approach can help identify the actual limiting factor and avoid unnecessary bit replacement or aggressive parameter adjustments.
How Drill Bit Selection Affects Penetration Rate
Drill bit selection has a direct influence on rock drilling penetration rate because the bit is responsible for converting the impact energy from the drilling system into effective rock fragmentation. Even when the drill rig and operating parameters are working correctly, an unsuitable drill bit can limit penetration and increase tool wear.
The best-performing bit is not necessarily the one with the most aggressive design or the lowest purchase price. Its performance depends on how well the bit design matches the rock formation, hole diameter, impact system, rotation speed, feed pressure, and drilling method.
Bit Diameter
Bit diameter affects both the amount of rock that must be broken and the drilling load placed on the system.
A larger bit generally needs to break a larger area of rock with each impact. If the drilling system does not provide sufficient impact energy and rotation capacity for the selected diameter, penetration rate may decrease.
The bit diameter should therefore be matched with:
- Required hole diameter
- Rock formation
- Available impact energy
- Drill rig capacity
- Drilling tools specifications
- Required drilling performance
Using a bit that is too large for the available drilling system can reduce penetration and increase mechanical load.
Carbide Button Shape
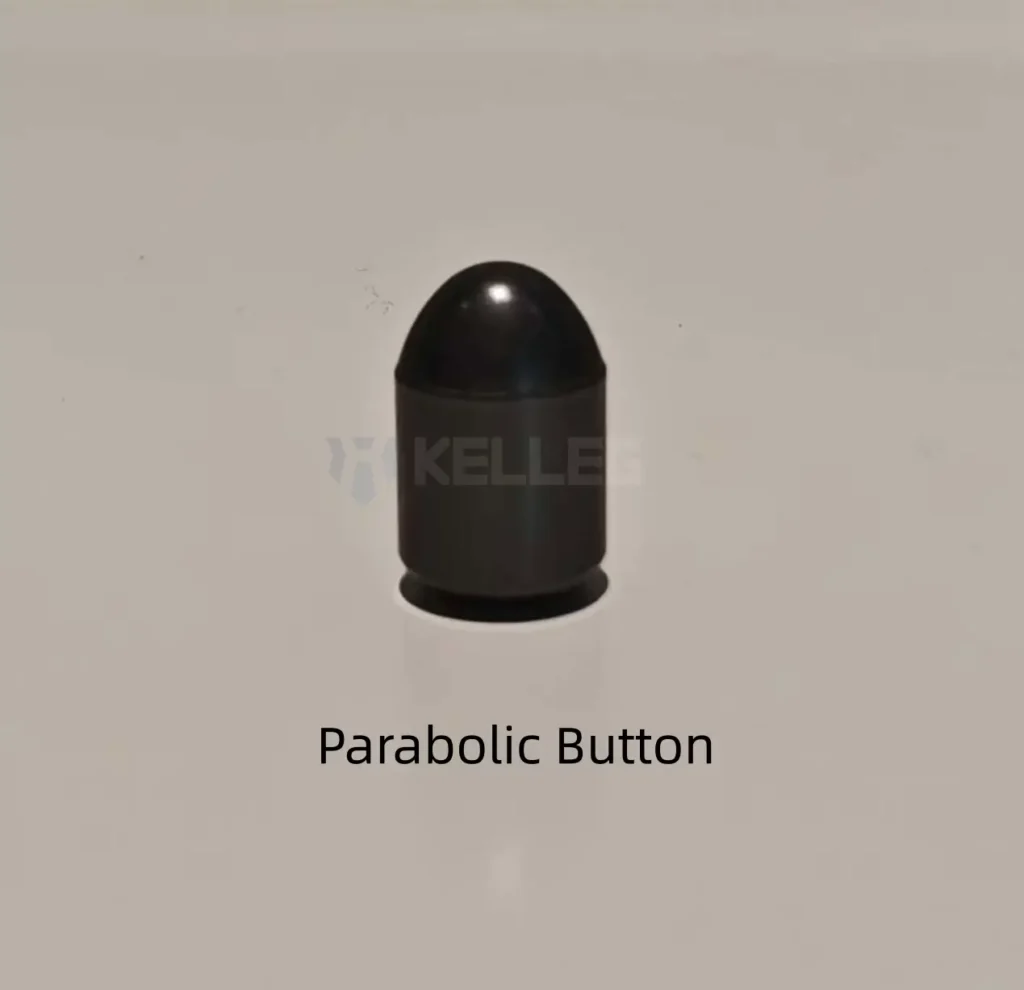
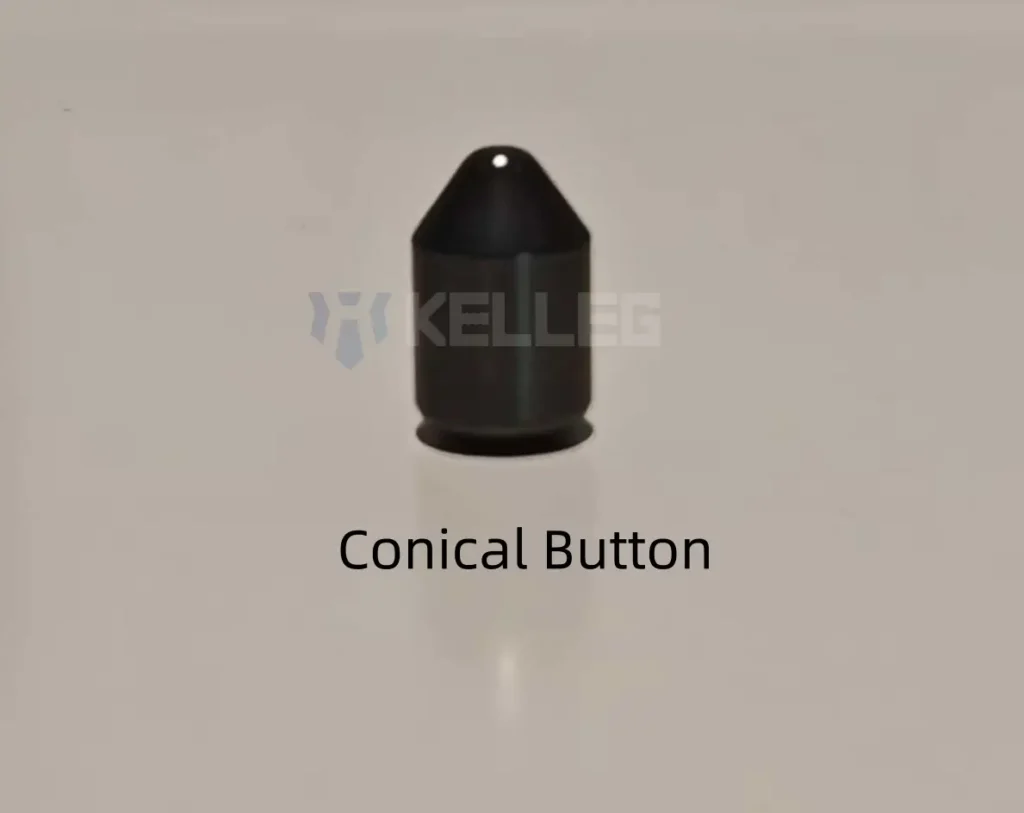
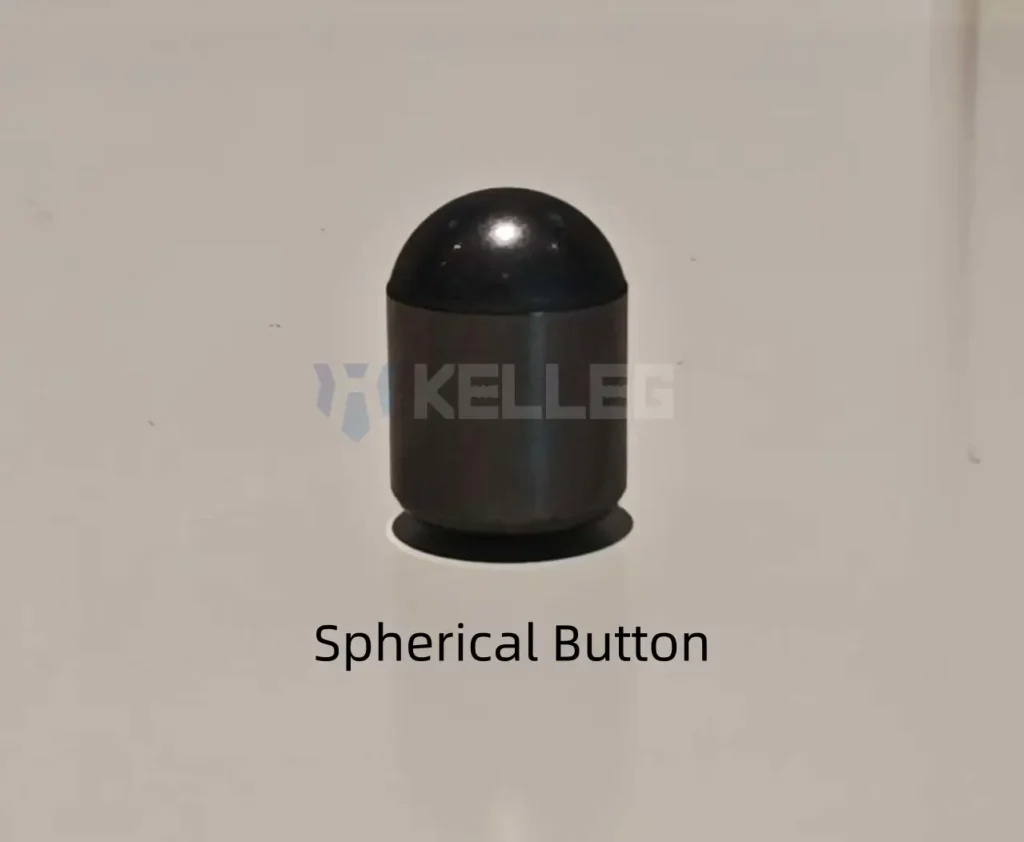
The shape of the carbide buttons influences how impact energy is concentrated and how the buttons interact with the rock.
Different button profiles can provide different combinations of:
- Rock-breaking efficiency
- Penetration performance
- Wear resistance
- Impact resistance
The appropriate button profile should therefore be selected according to the balance between penetration requirements and expected wear conditions.
Button Layout
The arrangement and distribution of carbide buttons across the bit face also affect how effectively the bit breaks the rock.
A properly designed button layout helps distribute impacts across the hole bottom and maintain effective rock-breaking coverage. The gauge area is particularly important because gauge buttons help maintain hole diameter and contribute to stable drilling.
An unsuitable button layout may result in:
- Uneven wear
- Poor rock-breaking coverage
- Increased vibration
- Reduced penetration
- Faster gauge wear
Therefore, button configuration should be considered together with the rock formation and bit diameter rather than evaluated independently.
Face Design
The overall face design determines how the bit interacts with the rock and how efficiently broken material can be removed.
Different face configurations may be designed to achieve different priorities, such as:
- Faster penetration
- Better flushing
- Improved stability
- Greater wear resistance
- Better performance in fractured or competent rock
The optimal face design depends heavily on the drilling environment. A design that performs efficiently in one formation may not deliver the same results in another.
Bit Design for Different Rock Formations
There is no single drill bit design that provides the highest penetration rate in every rock formation.
The selection should take into account factors such as:
- Rock hardness
- Compressive strength
- Abrasiveness
- Fracturing and geological structure
- Hole diameter
- Impact energy
- Rotation speed
- Drilling method
- Required bit life
For example, drilling in hard, competent rock may require a different carbide configuration and face design than drilling in softer or highly abrasive formations. In fractured rock, drilling stability and flushing performance may become particularly important.
This is why penetration rate should not be used by itself to judge whether a drill bit is suitable. Bit life, drilling stability, hole quality, and cost per meter should also be considered.
Choose the Bit Based on the Complete Drilling Condition
The right drill bit should be selected based on the complete drilling condition rather than price alone.
A lower-cost bit may appear attractive initially, but if it produces slower penetration or wears significantly faster, its actual cost per meter may be higher. Conversely, a higher-quality bit that maintains stable penetration and longer service life can provide better overall drilling economics.
Conclusion
Low rock drilling penetration rate is rarely caused by one factor alone. Changes in rock formation, drill bit condition, feed pressure, rotation speed, impact energy, flushing efficiency, equipment performance, and drilling alignment can all affect how efficiently a drilling system breaks and removes rock.
When penetration rate drops, simply increasing feed pressure, rotation speed, or impact energy is not always the right solution. An aggressive adjustment may temporarily increase drilling speed while also accelerating bit wear, increasing vibration, damaging drill rods, or raising the overall cost per meter.
The more effective approach is to diagnose the complete drilling system and identify the actual limiting factor.
Match the drilling tools, equipment, and operating parameters to the actual rock conditions.
A properly matched drilling system can help maintain stable penetration, improve tool life, reduce unnecessary downtime, and achieve a more competitive cost per meter.
If you are experiencing low penetration, excessive drill bit wear, or unstable drilling performance, Kelleg can help you select suitable rock drilling tools based on your rock formation, hole diameter, drilling method, and equipment.
Contact Kelleg to discuss your drilling conditions and find a suitable rock drilling solution.